Category / Section
How to show role-based SSAS data in dashboard widget
Published:
Administrators in the Microsoft SQL Server Management Studio can configure the settings and access the role-based database in SSAS. This article explains the steps involved in accessing the role-based database in SSAS and visualizing the data in a widget.
Accessing a role-based database in SSAS
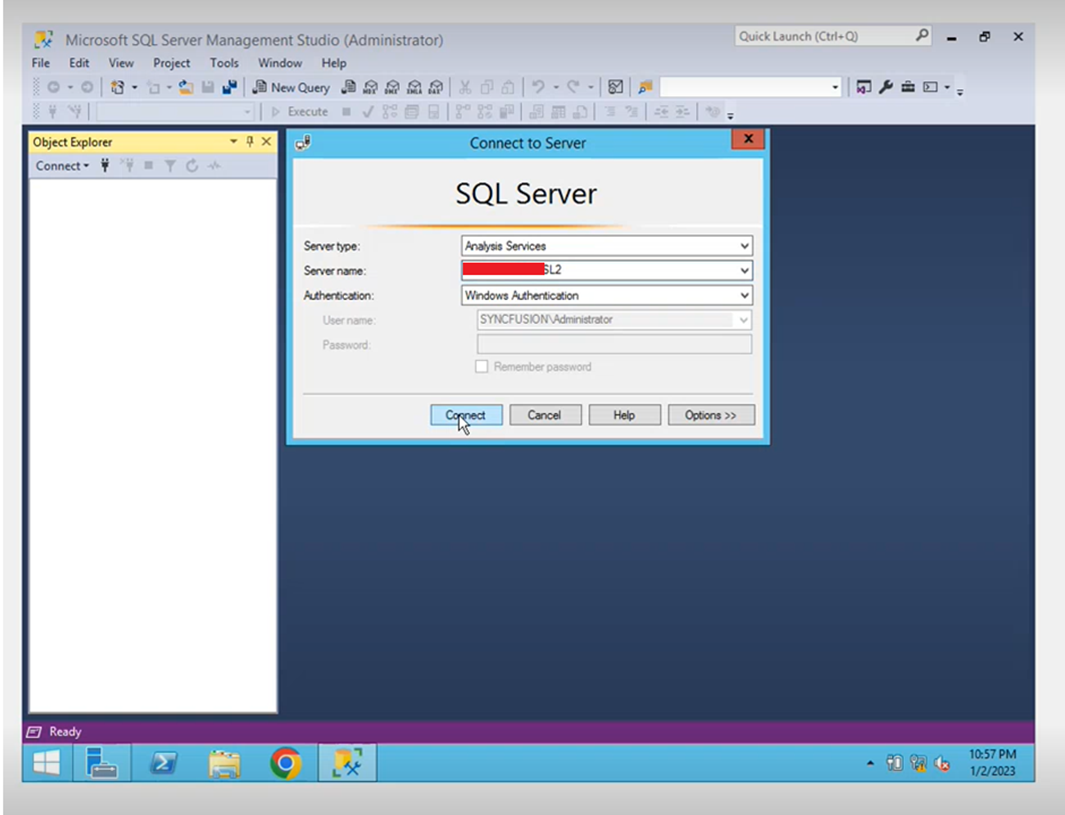
Follow these steps to access the role-based data on the SQL Server Management Studio:- Open the SQL Server Management Studio and enter the credentials, then click Connect to proceed.
- On the Object explorer page, expand the values under the Databases, then expand Roles and select.
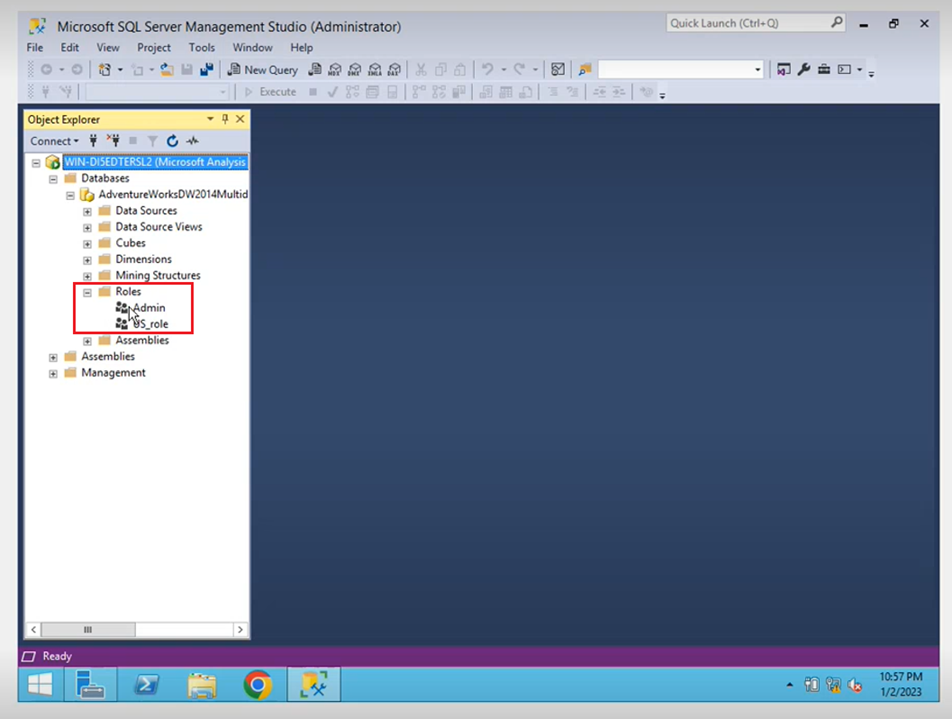
- Enable the available roles on the database as follows.
- Admin
- Create roles for the users in the Microsoft SQL Server Management Studio database. For example, the users below are assigned to the Admin role, and admin-level access has been provided.
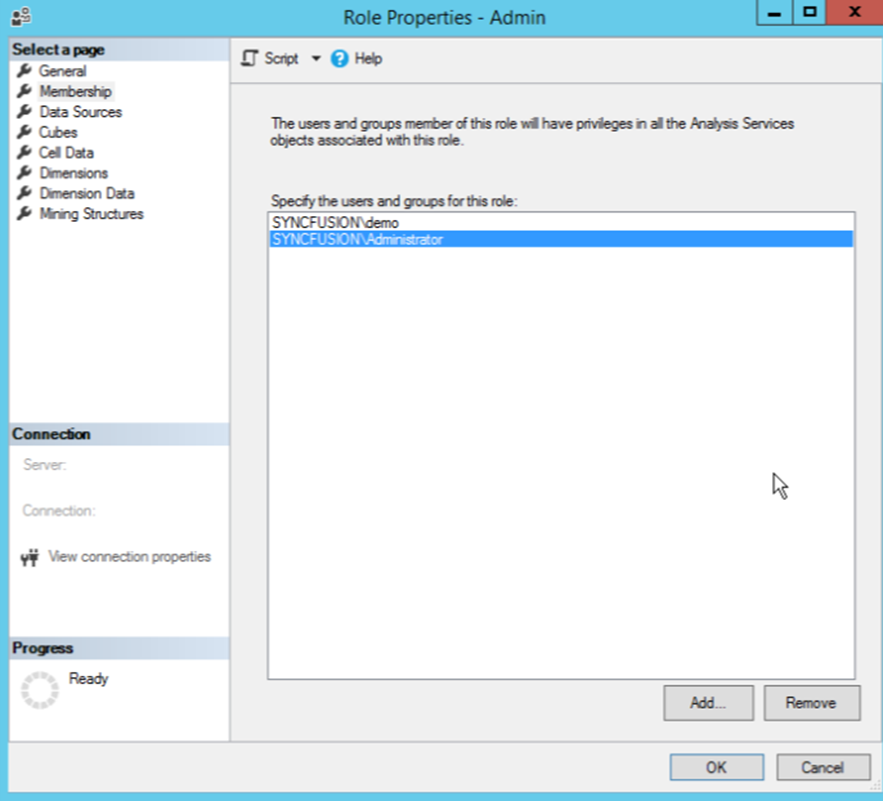
- Select and allow the members under the Admin section to access all the dimensions data in the admin roles on the database, then click OK.
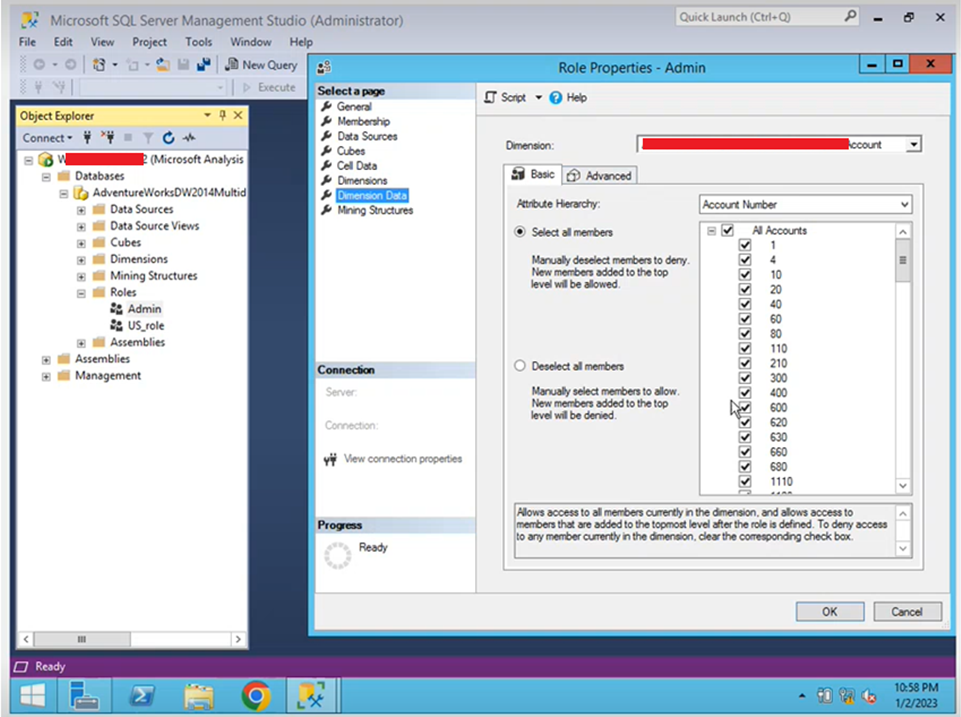
- Create roles for the users in the Microsoft SQL Server Management Studio database. For example, the users below are assigned to the Admin role, and admin-level access has been provided.
- US_role
- Create roles for the users in the Microsoft SQL Server Management Studio database. For example, the below users are added to the US_role, and user-level access has been provided.
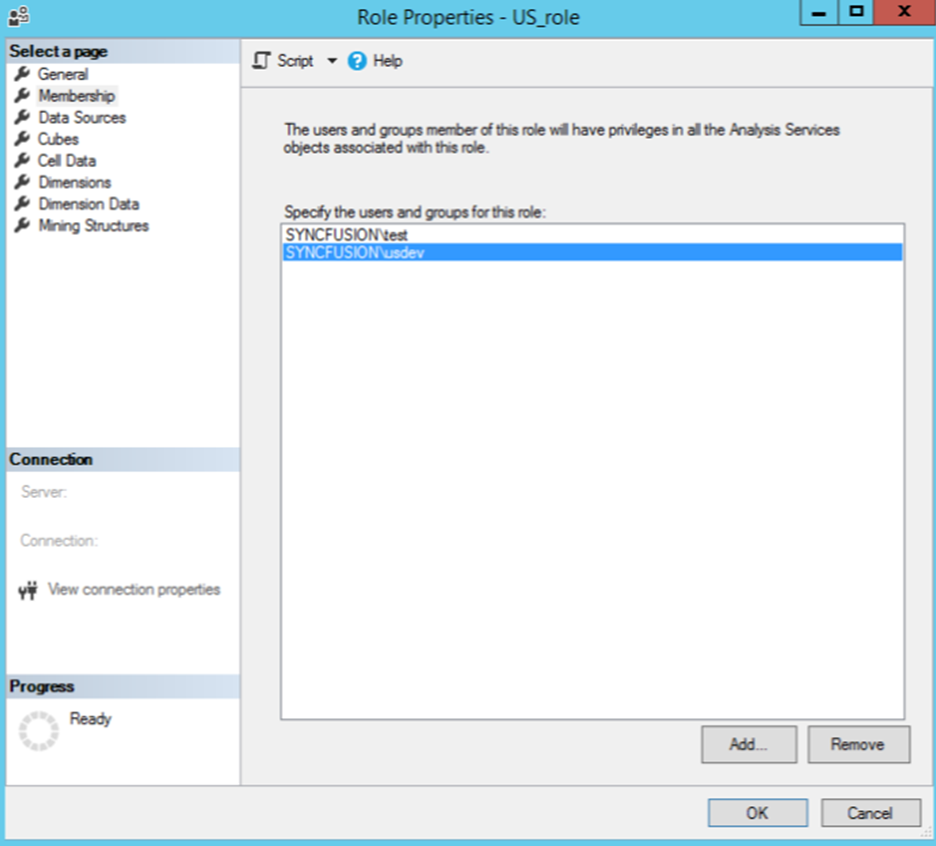
- Select and allow the members under US_role section to access only the restricted dimensions data on US_role on the database, then click OK.
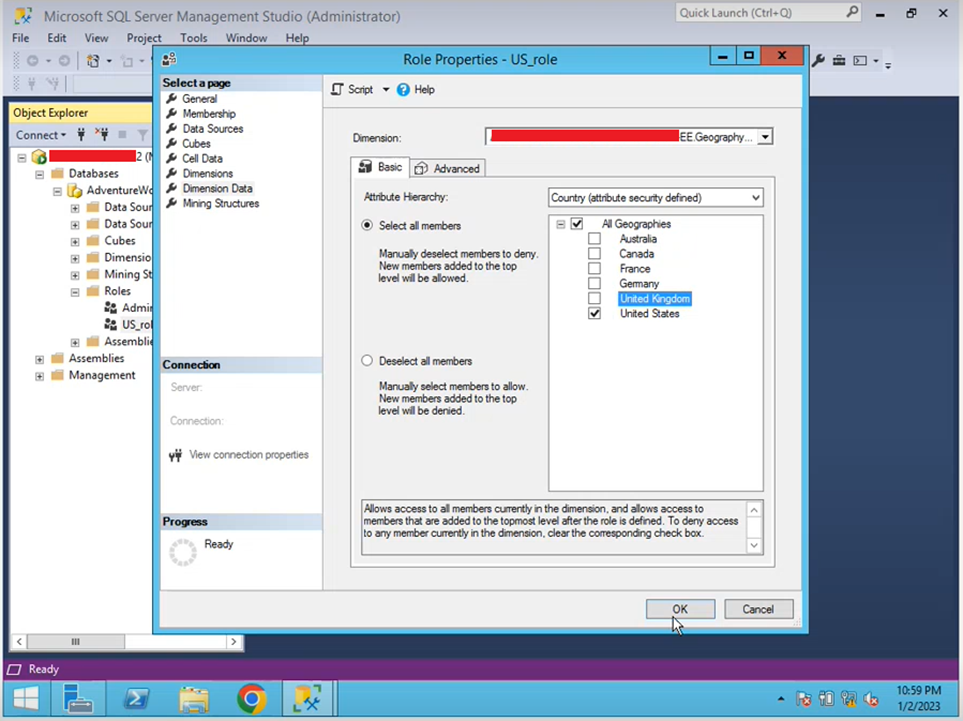
- Create roles for the users in the Microsoft SQL Server Management Studio database. For example, the below users are added to the US_role, and user-level access has been provided.
- Admin
Importing and synchronizing users with Windows Azure AD
After creating the roles and providing access permission to users on the Microsoft SQL Server Management Studio, the users need to be imported and synchronized to the Bold BI application. The users can be imported and synchronized using Azure AD, as explained on this link.Connecting Microsoft SQL Server Analysis Services with Impersonation in Bold BI
- Open the Bold BI application.
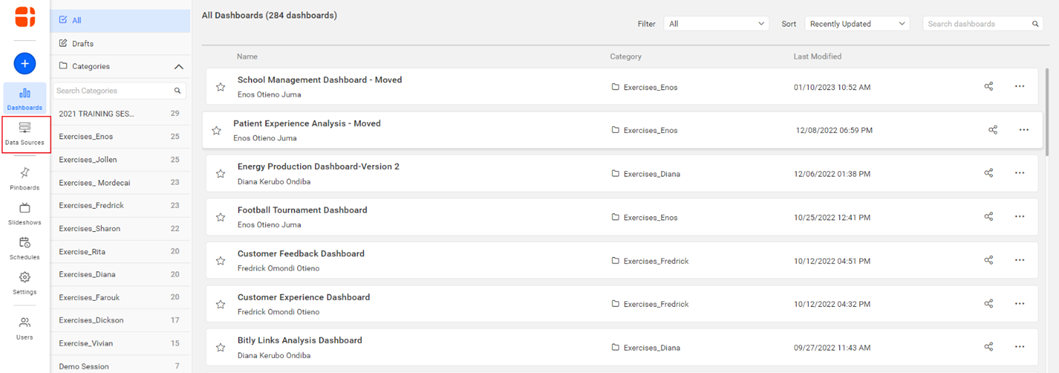
- Click the data sources icon to proceed to the data sources page.
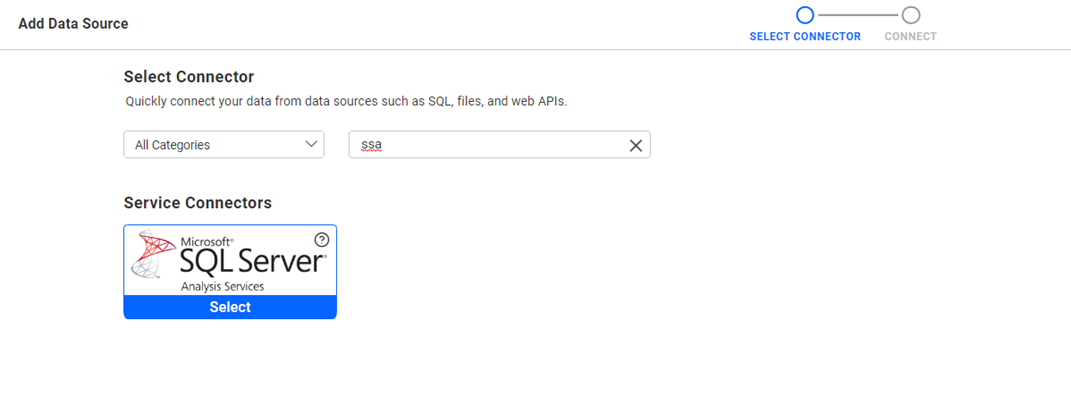
- On the Data Sources page, search and select the Microsoft SQL Server Analysis data source.
- Enter the data source name, server name, authentication type, and database name, then click Connect to proceed to the data source preview.
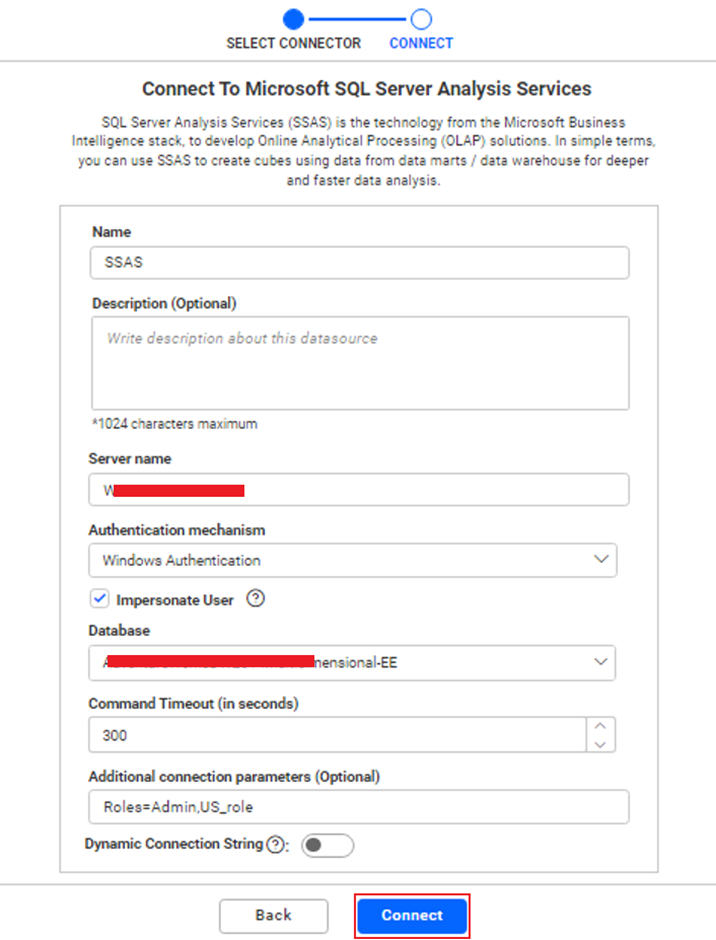
NOTE: When impersonation is enabled, it is mandatory to specify the role names in the database in the Additional Connection Parameters text box. You can specify all the roles in the database by separating them with commas. The data will be displayed for the impersonated user based on the permission specified for them.
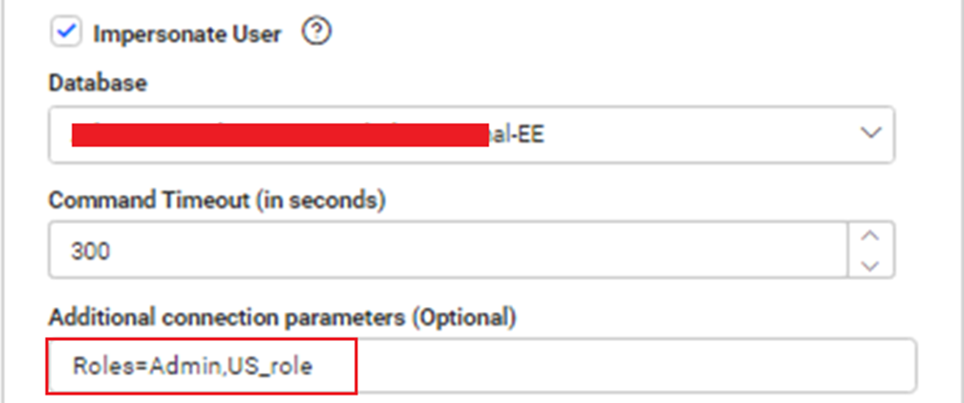
- After connecting the impersonated SSAS data, you can proceed to create dashboards.
- Connect with Windows AD while logging into the Bold BI Application to authenticate the users with windows authentication.
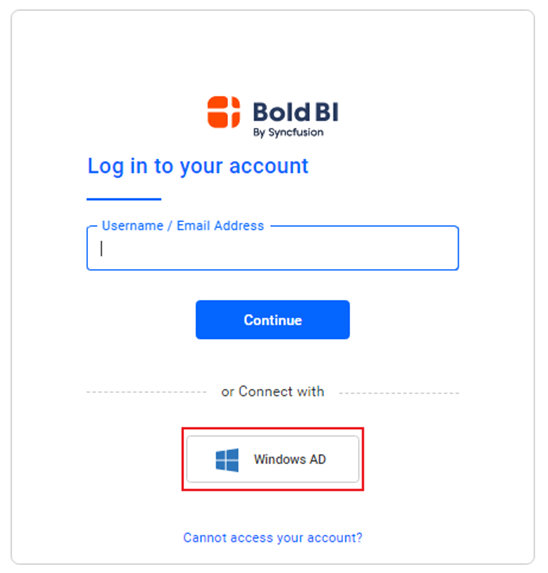
NOTE: The option to connect Bold BI with Windows AD is only available on the on-premise version of Bold BI and is not applicable on the cloud version.
- When the user under the Admin role logs into the Bold BI application, the Admin data will be showcased on the dashboard, as shown in the following image.

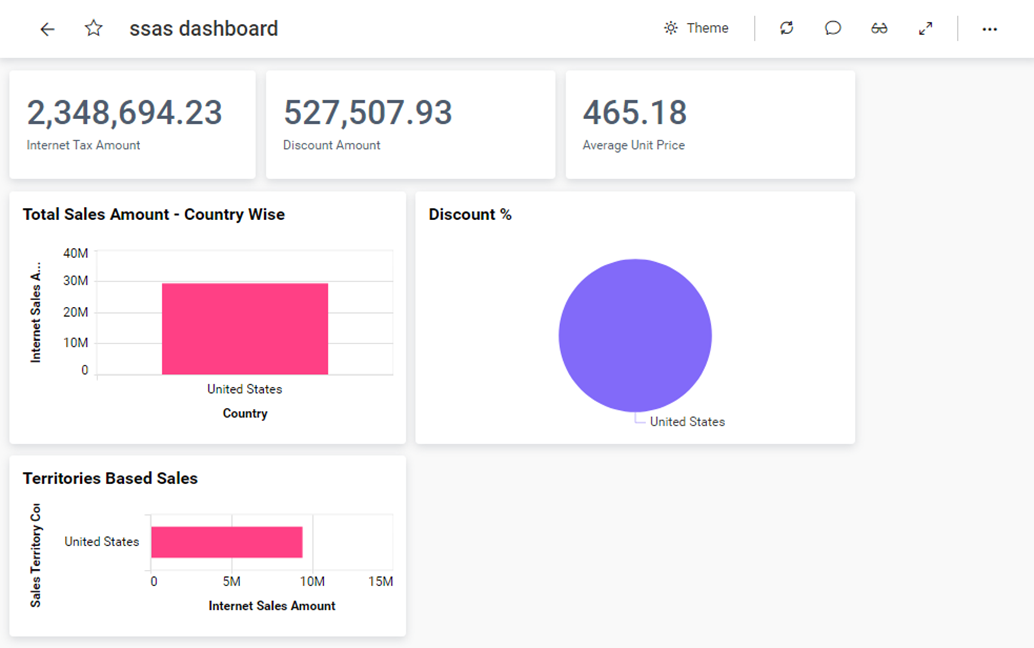
- When the user under the US_role logs into the Bold BI application, the US_role data will be showcased on the dashboard, as shown in the following image.
Related links
