How to deploy a new Azure SQL Database in Azure environment
Prerequisites
- An active Azure subscription. If you don't have one, create a free account.
- Much of this article can be accomplished with the Azure portal alone. Optionally, use the latest version of Azure PowerShell or Azure CLI.
Create a single database
To create a single database in the Azure portal, this quickstart starts at the Azure SQL page.
Under SQL databases, leave Resource type set to Single database, and select Create.
On the Basics tab of the Create SQL Database form, under Project details, select the desired Azure Subscription.
For Resource group, select Create new, enter myResourceGroup, and select OK.
For Database name, enter mySampleDatabase.
For Server, select Create new, and fill out the New server form with the following values:
Server name: Enter mysqlserver, and add some characters for uniqueness. We can't provide an exact server name to use because server names must be globally unique for all servers in Azure, not just unique within a subscription. So enter something like mysqlserver12345, and the portal lets you know if it's available or not.
Location: Select a location from the dropdown list.
Authentication method: Select Use SQL authentication.
Server admin login: Enter the admin username.
Password: Enter a password that meets requirements, and enter it again in the Confirm password field.
Leave Want to use SQL elastic pool set to No.
For Workload environment, specify Development for this exercise.
The Azure portal provides a Workload environment option that helps to preset some configuration settings. These settings can be overridden. This option applies to the Create SQL Database portal page only. Otherwise, the Workload environment option has no impact on licensing or other database configuration settings.
- If you choose the development workload environment, please configure the following.
- Backup storage redundancy option is locally redundant storage. Locally redundant storage incurs less cost and is appropriate for pre-production environments that do not require the redundance of zone- or geo-replicated storage.
- Compute + storage is General Purpose, Serverless with a single vCore. By default, there is a one-hour auto-pause delay.
- If you choose the Production workload environment, please configure the following.
- Backup storage redundancy is geo-redundant storage, the default.
- Compute + storage is General Purpose, Provisioned with 2 vCores and 32 GB of storage. This can be further modified in the next step.
- If you choose the development workload environment, please configure the following.
Under Compute + storage, select Configure database.
This quickstart uses a serverless database, so leave Service tier set to General Purpose (Most budget-friendly, serverless compute) and set Compute tier to Serverless. Select Apply.
Under Backup storage redundancy, choose a redundancy option for the storage account where your backups will be saved. To learn more, see backup storage redundancy.
Select Next: Networking at the bottom of the page.
On the Networking tab, for Connectivity method, select Public endpoint.
Under Connection policy and Minimum TLS version, leave the default values.
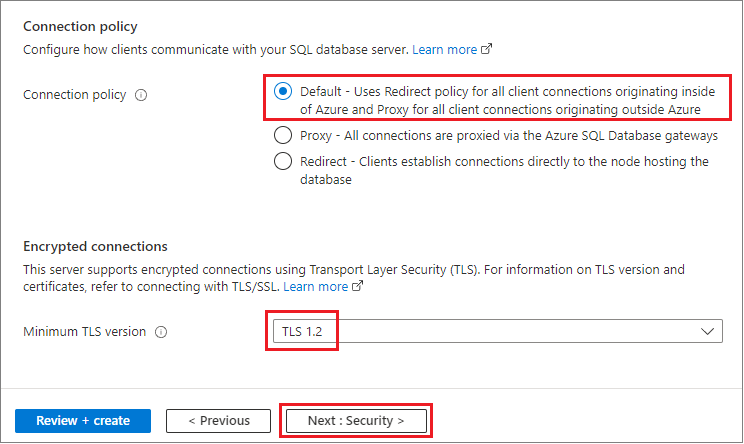
Select Review + create at the bottom of the page.
On the Review + create page, after reviewing, select Create
Create a server-level IP-based firewall rule
We'll use the following steps to create a server-level IP-based, firewall rule for a specific, client IP address. This enables external connectivity for that IP address through the Azure SQL Database firewall.
After the database deployment completes, select SQL databases from the left-hand menu and then select mySampleDatabase on the SQL databases page. The overview page for your database opens. It displays the fully qualified server name (such as mydocssampleserver.database.windows.net) and provides options for further configuration. You can also find the firewall settings by navigating directly to your server, and selecting Networking under Security.
Copy the fully qualified server name. You will use it when you connect to your server and its databases in other quickstarts. Select Set server firewall on the toolbar.

Set Public network access to Selected networks to reveal the virtual networks and firewall rules. When set to Disabled, virtual networks and firewall rule settings are hidden.
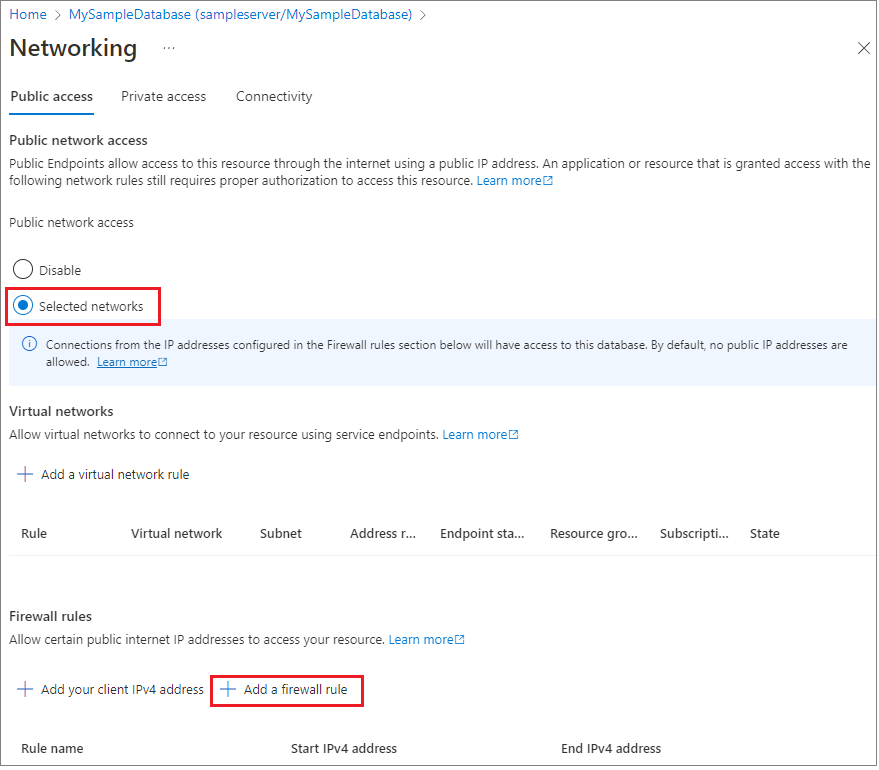
Choose Add your client IP to add your current IP address to a new, server-level, firewall rule. This rule can open Port 1433 for a single IP address or for a range of IP addresses. You can also configure firewall settings by choosing Add a firewall rule.
Note: By default, access through the Azure SQL Database firewall is disabled for all Azure services. Choose ON on this page to enable access for all Azure services. Select Save. Port 1433 is now open on the server and a server-level IP-based, firewall rule is created for your current IP address.
Close the Networking page.
Open SQL Server Management Studio or another tool of your choice. Use the server admin account you created earlier to connect to the server and its databases from your IP address.


Additional Reference :

